The SUM function is the most popular and widely-used function in Microsoft Excel, along with its automated version: AutoSum. When you click AutoSum, Excel automatically enters a formula (that uses the SUM function) to sum the numbers. In this video, I demonstrate the SUM function and show you a few tips that you may not know, even if you’ve used the SUM function for a while.
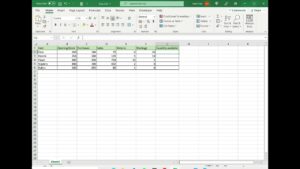
In this tutorial I demonstrate the various usages of SUM and AUTOSUM, using 4 example worksheets. The AutoSum function automatically figures out the range you need to SUM and applies the total automatically to it.
Chapters:
0:00 Intro
0:32 AutoSum
1:15 No numbers in the header
2:23 Select cells and AutoSum
3:15 CTRL to AutoSum ranges
5:20 Chart with AutoSum
The keyboard shortcut for AutoSum is ALT + =
Chris Menard’s blog post
https://chrismenardtraining.com/post/how-to-use-the-sum-function-and-autosum-in-microsoft-excel
Then we look at how to apply AutoSum for a range that has a number in the header row. That might throw off the AutoSum function to add the header row value as well. I show you how to circumvent that and exclude the header row from AutoSum by getting Excel to treat that cell as text.
Another example is to combine AutoSum with AutoFill. I demonstrate how you can AutoSum an entire spreadsheet, horizontally or vertically.
Finally, I demonstrate how you can create selections across multiple, non-adjacent number ranges and AutoSum everything automatically. Excel is smart enough to figure out that you have multiple ranges selected and AutoSum everything appropriately by taking into consideration the subtotals in your ranges.
Thanks for watching and let me know if you have questions about this video, and subscribe for more absolute beginner videos on Microsoft Excel in which I take each function and demonstrate it.
Visit my website:
https://chrismenardtraining.com
Visit my Microsoft Excel articles category:
https://chrismenardtraining.com/training/excel-blog
View more Excel tutorials in my extensive playlist of over 250 videos:
#excel #autosum #excelsum
File used in the video
https://drive.google.com/file/d/1C87HCi4AoyadXALDQLN9wVQAFaSJgebq/view?usp=sharing
And make sure you subscribe to my channel!
— EQUIPMENT USED ———————————
○ My camera – https://amzn.to/3vdgF5E
○ Microphone – https://amzn.to/3gphDXh
○ Camera tripod – https://amzn.to/3veN6Rg
○ Studio lights – https://amzn.to/3vaxyy5
○ Dual monitor mount stand – https://amzn.to/3vbZSjJ
○ Web camera – https://amzn.to/2Tg75Sn
○ Shock mount – https://amzn.to/3g96FGj
○ Boom Arm – https://amzn.to/3g8cNi6
— SOFTWARE USED ———————————
○ Screen recording – Camtasia – https://chrismenardtraining.com/camtasia
○ Screenshots – Snagit – https://chrismenardtraining.com/snagit
○ YouTube keyword search – TubeBuddy – https://www.tubebuddy.com/chrismenard
DISCLAIMER: Links included in this description might be affiliate links. If you purchase a product or service with the links I provide, I may receive a small commission. There is no additional charge to you! Thank you for supporting my channel, so I can continue to provide you with free content each week!