Create a Gradebook on Microsoft Excel: Make a Weighted Points Grade Sheet
Microsoft Excel is a great program for creating simple grade books! Using a spreadsheet (and a couple formulas) will reduce the time it takes to record and calculate grades. You don’t need to be familiar with Excel to follow our quickstart guide. This wikiHow article will walkthrough how to create a point-based grade book on Microsoft Excel.
Things You Should Know:
- Create columns for student names, assignment grades, total points, possible points, numeric grade, and letter grade.
- Use the SUM function to add each student’s assignment points, then use the “/” division operator to divide their total earned points by the total possible points.
- Weight assignments by assigning more or less points.
Create a New Workbook

Start a new workbook in Excel. Select New blank workbook on the home page.
- Alternatively, there are free templates for grade books online! Click More templates on the home page to search for “grade book” templates. You may see different templates depending on what version of Excel you’re using.
- The web app version of Excel has two grade book templates, one for points-based grading and another for percentage-based grading.

Add general information. For the purpose of organization, name the sheet you’re creating and include general information about the class (e.g. instructor’s name, course title, meeting times). This is helpful for when you need to print the document, make copies, and share it with others.
- For more general spreadsheet info, check out our guide on making a spreadsheet in Excel.
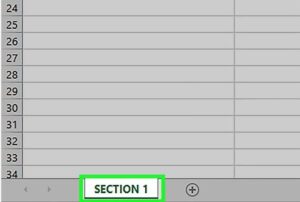
Name the grade book sheet.
- Double click “Sheet1” at the bottom window. “Sheet1” should be highlighted.
- Type a name for the sheet. For example, “Section 1.”
- Press Enter.
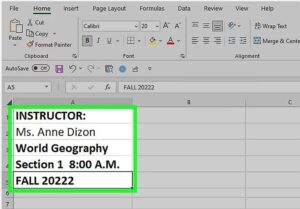
Add class information to your first sheet. After typing each line of information, pressing Enter will confirm what you typed and move your selection to the next cell down.
- Click cell A1 to select it.
- Type the instructor’s name and press Enter. This will move your selection to A2.
- Type the class name in A3. For example, “World Geography.”
- Type the section number and meeting time in A4.
- Enter the term in A5. For example, “Fall 2022”
Create the Layout
Start creating the grade book layout. This guide will cover a points-based grade book with columns for student numbers, student names, assignment grades, total points, possible points, a percentage grade, and a letter grade.
- This guide will cover one way to arrange your grade book. However, there are infinite ways to format an Excel spreadsheet. Try different templates and formats to find what works best for you!

Enter the numbers of the section’s students. Start in A7, below the class information. You’ll put the student numbers, first names, and last names in 3 separate columns, A through C.
- Select A7 and type “Student Number.” Row 7 will contain the column headers for each type of information you have in your grade book.
- Select A8 and type the number 1. Press Enter to enter the number in the cell and move down one.
- Type the number 2 in A9.
- Click and drag the cursor from A8 to A9. Both cells should be highlighted with a box around them.
- Hover your cursor over the lower right corner of the box until the cursor becomes a plus +(this is called the fill handle).
- Click and drag until you have a list of numbers for each student in your section.

Enter the names of the section’s students. Now you’ll type in the first and last names of your students.
- Select B7 and type the column header “First Name.”
- Select C7 and type the column header “Last Name.”
- Type in the students’ first and last names in columns B and C.
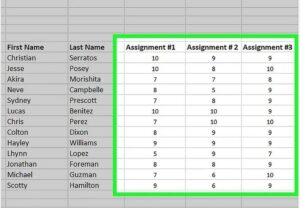
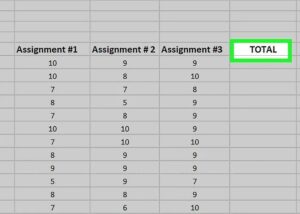
Create assignment columns. Enter each assignment as a column header, starting in D7 and moving horizontally across row 7. Press Tab to move your selection to the right by one cell.
- You’ll insert the students’ assignment grades under each column.
- Note: For this guide, we’ll use a point-based grading structure, meaning each assignment is worth a certain amount of points.
Calculate Grades with Formulas
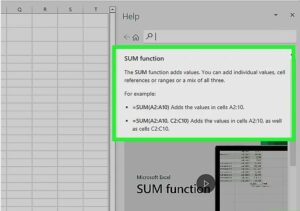
We’ll use the SUM function to find each students’ total points. Then, we’ll divide that by the maximum possible points that can be earned to get a grade!
- Note: Make sure to check your spreadsheet calculations by doing a few calculations by hand. This is a great way to catch any errors in your spreadsheet.
- Read more about the SUM function in our complete guide.
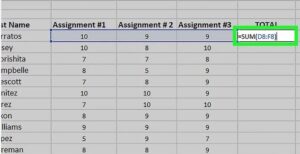
Type “=SUM(” in the cell directly below the “total” column header. Then, click and drag your cursor to highlight all the first student’s assignment points. The range should appear in the formula. Complete the formula by typing “)” after the range.
- Alternatively, you can type in the range instead.
- For example, if you have 5 assignments in columns D through H and the student names start on row 8, you’ll enter D8:H8

Duplicate the formula. Now you can copy this formula in the “total” cell for each student. To do so:
- Select the cell with the total summation formula. Click and drag the fill handle (the square in the bottom-right of the selection) down to the last student to automatically apply the sum formula to each row.
- Using our earlier five-assignment example, let’s say there are 10 students. The second student summation should now have a range of D9:H9, the third student D10:H10, down to the last student with D17:H17.
Create a “possible points” column directly to the right of the “total” column. This column will contain the possible points for the course.
- Enter the possible points in each cell below the header.
- For example, if each assignment is out of 10 points, and there are five assignments, the possible points will be 50.


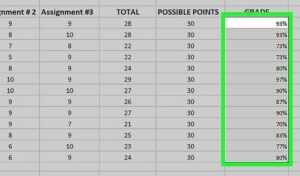
Create a “grade” column directly to the right of the “possible points” column. This will contain the percentage grade for each student.
Type “=J8/K8”. Where the numerator is the total points earned, and the denominator is the total possible points. The column and row may vary depending on how many assignments are in the grade book.

Duplicate this formula. Use the fill handle technique from earlier to calculate a grade for each student.
- You can change the grades to percentages by selecting the grade values and changing the data type to “percentage.” Find this by navigating to Fields tab > Properties group > Data Type.
Assign Letter Grades
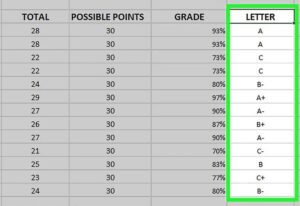
Create a “letter” column directly to the right of the “grade” column. This is where you’ll insert the letter grade for each student. To do so manually:
- Compare the student’s grade to your grading structure.
- Insert the letter associated with that student’s grade.
- For example, if an “A” is 89 to 100 percent and a student scores a grade of 93, place an “A” in the “letter” column.
Weight Assignments
To weight assignments, change the possible points for each assignment. In a point-based grading system, points can be used to weight assignments.
- For example, a 20-point assignments has double the weighting of a 10-point assignment.
- To weight entire categories, make their points add to the percentage of the total grade you want the category to represent.
- For example, if your course has 100 total points and you want five quizzes to represent 20 percent of the total grade, each quiz should be worth 4 points.